Did you know we sell quality Japanese Tree Diameter Tapes, Nikon Forestry Pro Laser Range Finders, arborist gear and more – go to arborgreen.com.au for more info
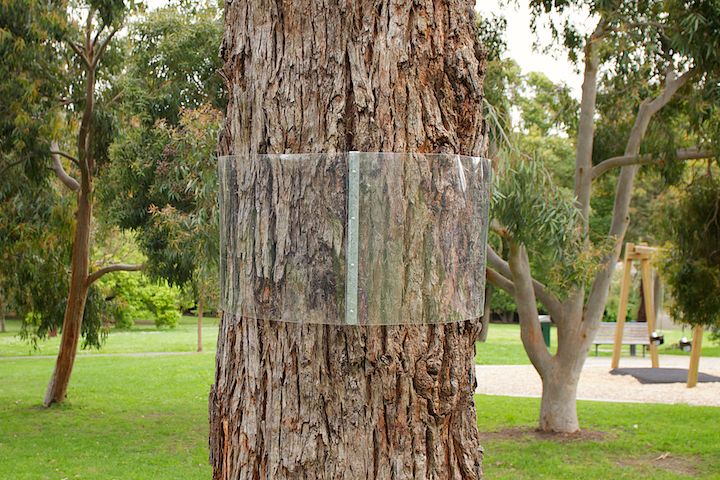
(above) we see all sorts of creative uses & installations for Possum Guard!
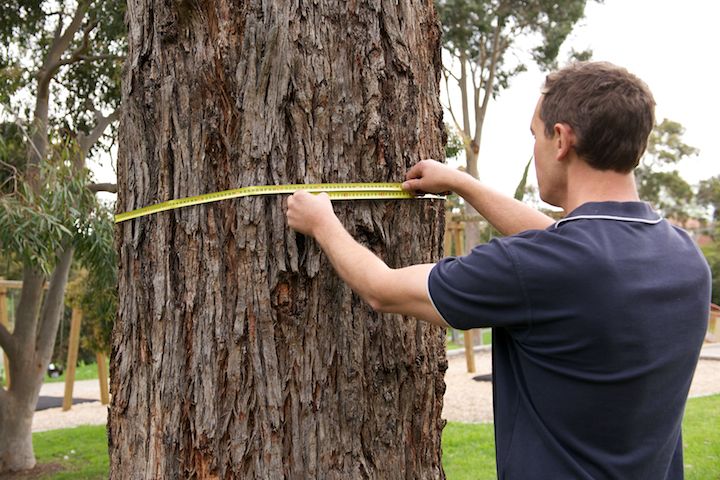
1) Measure the circumference of the trunk at the height you wish to place the possum guard. Allow at least 1500mm above the ground and allow for a 100mm overlap.
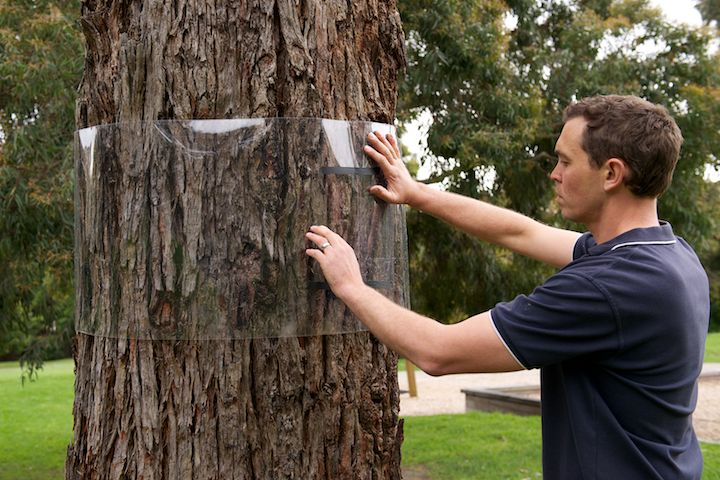
2) Unroll and measure the guard to the required length. Cut the guard at the required length using the galvanised joining strip as a guide.
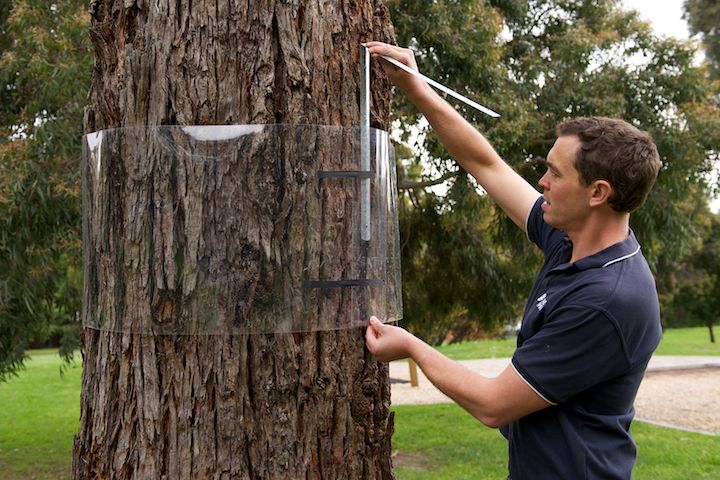
3) Wrap the guard around the tree. Use tape to secure the guard at the desired height.
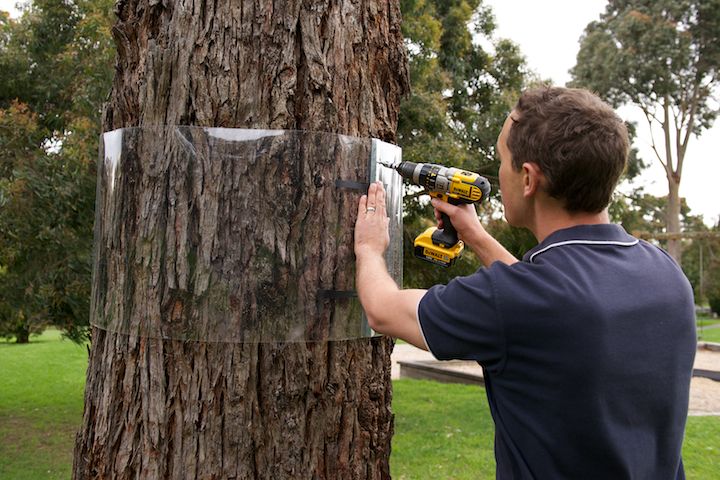
4) Clamp the joiner down, using a drill, screw the top screw into the joiner to fasten it. Then proceed and screw all remaining screws into the joiner.
5) The installation of the possum guard is now complete. As part of ongoing maintenance the guard can be adjusted as the tree grows – simply remove the screws from the joiner, reposition the overlap and reset the screws.